mbellis
Top 250 Contributor
Share mbellis's profile
mbellis's Stats
mbellis's Stats
- 4.2Average Rating
- 518Helpfulness Votes
- 0Featured Reviews
- 19Review Count
- October 17, 2011First Review
- April 24, 2019Last Review

Mercedes-Benz Arocs 3245
Mercedes-Benz Arocs 3245
Posted:August 15, 2015
mbellis
Age:
35-44
years old
Customer Type:
LEGO Fan
Building Experience:
Expert LEGO builder
Overall:

5
/
5
Best Technic Truck - LEGO Pneumatics is Back!
" Building Experience:
I took my time to enjoy this one!
Part 1: The Straight-6 engine is one of the first things to build. Some of the front suspension support is built in later parts.
Part 2: The gearbox for the functions is well-designed. Initially I got the pneumatic pump upside down but it was easy to fix. Some functions are fed through the white clutch gear but the Linear Actuator for the tipper has a clutch of its own and the pneumatic pump doesn't need one.
Part 3: I like the rear suspension; not difficult to build, good functions and interesting use of new parts. Good for re-use in future.
Part 4: The crane base is undoubtedly the most challenging part of the build, fitting all the pneumatic tubes in a small space without impeding the crane's ability to turn and without touching adjacent moving parts.
Part 5: The cab has more realistic features than those from other Technic truck sets. Good use of pegs with rods (part of flick-weapons in other sets).
Part 6: The tipper body is the easiest part. The grey 3x11 curved panels are a welcome complement to the 5x11 rectangular ones. The lock for the tipper door is an improvement on ones from previous sets.
Playability:
- I really enjoyed practising the crane loading process, using the 4 pneumatic functions and the motorised turntable function. You have to change turntable direction with the battery box switch. I soon found a good rhythm of loading cycles.
- The tipper, outriggers and turntable motor functions each run at a good speed. The pneumatic pump is a bit slow.
- The suspension works well. Perhaps swap for some stronger springs on the rear (similar to the front ones) if you want to load it up heavily.
- The steering works well but the range is limited.
- Compared to the pneumatic excavator 8851 that I had aged 9, this set has similar pneumatic loading capability but also more functions so it will provide many hours of fun.
Parts:
- The new pneumatic parts have updated nozzle shapes that help attachment and detachment of tubes. They are backwardly compatible with previous parts; this is an important point that I am pleased (relieved!) to verify. Previous tubes will fit without falling off under moderate pressure (2 bar normal, 3 bar maximum). Best to use the new tubing (from Unimog 8110 and after) with the new parts as it is easier to detach from them. The T-junction and hose holder/extender have not changed.
- An updated 20-tooth cog design grips the axles better. The old ones could slide on a gearbox axle to change gear so, if gearboxes are your thing, get another set with older cogs while you can!
- The new telescopic parts look really useful. They complement the 1/11 pneumatic cylinder well and provide plenty of mounting points.
- The new turntable works well, with less friction than the old ones. The bevel gear function is welcome. Hope the old ones will still be used sometimes as the inner ring of teeth is useful for gearboxes and they also fit in a Hailfire Droid wheel!
- Good to see more of the 1x4 with ball joint cup in the suspension mechanisms.
- Some parts appear in only 1 colour that is very distinct from other colours, e.g. 1x2 in yellow. Whilst this makes it easier to find the right piece during the build, it may detract from the authenticity of the model.
Really good:
- New pneumatics, turntable, clam-shell grab and telescopic parts.
- Other useful parts include grey panels (straight and curved), the latest gear selectors, ball joint pieces and powerful L-motor.
- Double rear wheels and double rear axle drive.
- New truck suspension mechanisms to try in your own models.
- The new pneumatic parts are backwardly compatible with previous parts. LEGO pneumatics now has a good way forward that is worth further investment.
- Challenging for experienced Technic builders of all ages; this adds value. The crane base even challenges those of us who have built with Technic for 30 years!
- The division of the build into 6 parts helps a lot because of the large total parts count. There is the option to build some modules in a different order if you like. It may need at least 10 hours in total but each part should take 3 hours or less (plus sorting). The last part can be done in 40 minutes.
- Enough pneumatic parts to make a pseudo-steam engine or automatic model. Start with 2 valve switches and 2 cylinders controlling each other.
- The amount of Power Functions is useful and not overwhelming, just a battery box and the best motor for the job. This means more of the value of the set is in the model functions and other complex parts.
Not so bad:
- Although this truck would cause every young engineer's eyes to pop out on Christmas morning, even for those younger than the recommended 11 years old, this is not really a "parents build it on Christmas Eve" set. At 4am parents may get stuck with the tube routing! At least in 6 parts it is easier to keep it hidden over a longer period while you build it! I would recommend purchasing by 1st December if you have to build it in time for Christmas.
- The truck could do with more compressor power and/or an air tank. The single compressor cylinder and modest motor speed doesn't go far with cylinders that are longer than the previous ones (6M extension for 1/11 and 2/11 cylinders compared with 3.5M for 48mm cylinders in Unimog 8110). Speeding up the single compressor might help; it has just one gear off the gearbox that fixes the ratio, so it is a challenge for fans to upgrade it within the space underneath! A T-junction and hand pump could be added.
- Where the grab hoses reverse through 2 adjacent holes by the arm extension it seems to kink the hoses easily, restricting air flow. Massaging the tubes helps. Could the hoses have been shaped round a string capstan? Other hose routing is fine.
- Like many Technic sets, the truck could do with more steering range. Turning round in the hallway might be a challenge! The instructions say 28 degrees; a real truck is better than that.
- Some fans have commented about the wheels looking small. They are actually about right for the scale of the model compared to the real Mercedes-Benz Arocs truck; it is the off-road version with higher suspension clearance. I might try some older 68mm wheels from 5571 Black Cat truck instead of the 62mm ones and see if that makes a difference; anything much bigger would hit the wheel arches.
- A couple of minor issues with the instructions: Stage 93 sub-stage 3 is missing on page 255, so 2x blue pegs appear from nowhere at sub-stage 4. On page 328 the front bumper appears too early! These mistakes may be corrected for the web download instructions.
Needs improvement:
- The instructions do not show tube routing very well at all. Looking ahead to other stages helps a lot but it would be useful to have underneath-view photos of a real crane base at some stages. From sub-stage 19-20 on page 267, look ahead to sub-stage 27 on page 274. From sub-stage 36 on page 282 look ahead to sub-stage 42 on page 286. There are also the side-view photos at the end of the book on page 474. Sub-stage 35 appears to have a mistake in which arm of the T-junction connects to which tube. The instructions CAD package needs an improvement for pneumatic tubes, to show them acting like real tubes.
- The instructions do not show tube routing very well at all. Looking ahead to other stages helps a lot but it would be useful to have underneath-view photos of a real crane base at some stages. From sub-stage 19-20 on page 267, look ahead to sub-stage 27 on page 274. From sub-stage 36 on page 282 look ahead to sub-stage 42 on page 286. There are also the side-view photos at the end of the book on page 474. Sub-stage 35 appears to have a mistake in which arm of the T-junction connects to which tube. The instructions CAD package needs an improvement for pneumatic tubes, to show them acting like real tubes.
Opportunities for the future:
- The pneumatic 2/11 cylinder has more length taken up at either end than previous cylinders, which reduces the extension/length ratio. A possible opportunity missed is to add fixing holes like the linear actuators, where there is a cross hole as well as a round hole at each end; this would have made fixing for end-to-end or parallel telescopic mechanisms easy e.g. for tipper or fork-lift functions. I hope there will be a new end-to-end piece for the new cylinders like the ones in crane 8421 because the older ones don't fit these new cylinders. I hope for a new shorter 2-wide cylinder and hand pump eventually.
- A hand pump cylinder in the set would have been a good idea, to help with testing the crane. I used one from another set to ensure there were no trapped hoses before installing the crane on the truck chassis.
- When the crane arm functions descend it is easy to release all the air and let them fall all the way by mistake. The valve switches have a small region of partial opening to release air more slowly. This provides a known challenge to crane operation but it can be overcome with practice. For cost reasons it would be unrealistic to expect fine closed-loop control of the pneumatic functions in a set model but that functionality is possible to achieve; the parts in the set would be enough to build a model to demonstrate it for a single function.
- Chassis stiffness is as good as can be expected from studless construction. For larger Technic models it would be nice to see beams with studs used for stiffness in the main chassis, with studless modules attached to that.
Overall this is the best Technic flagship set yet, a must-buy for Technic enthusiasts and a great way to encourage young engineers. A worthy successor to the original pneumatic truck 8868 from 1991. LEGO pneumatics has a good future and fans will want to explore pneumatics more, so this raises some questions about how to get more of these pieces:
- Will the pneumatic parts be available in large numbers at a good price through customer services by January 2016?
- Will there be a smaller set with some of these pneumatic parts next year, to follow up the big set and help younger enthusiasts get into LEGO pneumatics? Thinking along the lines of excavator set 8837 from 1992 (as a change from adding a crane to another model).
- Will the LEGO company encourage engineers of all ages even further by once again suggesting ways to automate the pneumatic functions, following on from the alternative model of 8868? My Brickshelf has a few ideas! "
I would recommend this to a friend!
My Product Recommendations

Cargo Plane
 (45)
(45)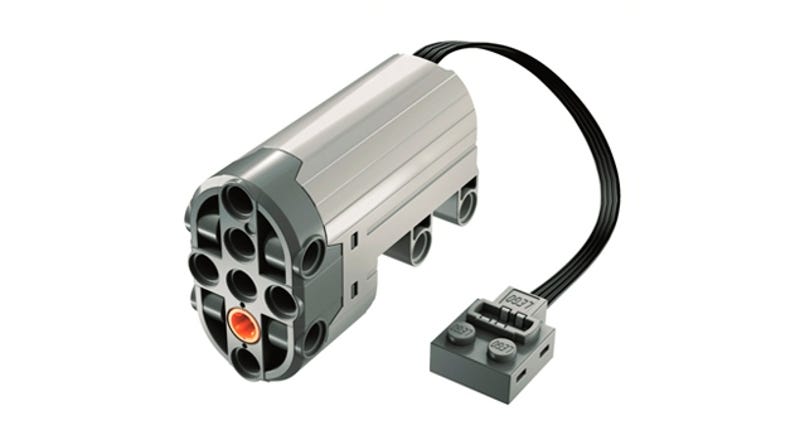
Power Functions Servo Motor
 (11)
(11)From: DERBY
From:
United Kingdom
Age:
35-44
years old
Customer Type:
LEGO Fan
Building Experience:
Expert LEGO builder
Purchased For:
Self
Build Time:
10
hrs
Play Experience (Optional):
5
/
5
Value for Money (Optional):
4
/
5
Level of Difficulty:
Challenging
Very Easy
Very Challenging
I would recommend this to a friend!
Share:
+10points
14of 18found this review helpful.

Power Functions Motor Set
Power Functions Motor Set
Posted:February 21, 2015
mbellis
Age:
35-44
years old
Customer Type:
LEGO Fan
Building Experience:
Expert LEGO builder
Overall:
5
/
5
Great Parts but Poor Value as a Set
" The parts in this set are great for getting your models moving, and lit. In most cases they can be fitted to the main model of a Technic kit in 15 minutes or less by following the extra instructions. Upgrading with Power Functions adds a lot of play value to a model.
The value-for-money from this particular set has been eroded by the rising price. If you add up the cost of the main parts: Battery box, Motor, Light Brick and Switch then it comes to only 71% of the set price. The remaining gears and universal joints are not worth more than a quarter of the difference so the set price should be reduced considerably. Until this price discrepancy is fixed, I would recommend that you check the set you are upgrading with Power Functions and if the small parts are not used, just buy the individual Power Functions parts. Aside from that problem, the parts are really good.
The battery box takes 6x AA cells. From one position the cell is hard to get out when you change them but a screwdriver at the positive end of the cell can lever it out easily enough. Having bought 3 of these kits and several Technic kits that each came with a battery box, I now have too many of them, but they have another use that is not so obvious. You can use an empty battery box to convert the 9V output of a mains-powered LEGO transformer power source to the Power Functions protocol. If you have a 9V train controller, or another source that connects to a 9V plug, then you can use a Power Functions cable (set 8886 or 8871) to connect the 9V plug to the (empty) battery box. If you also connect a Power Functions IR Receiver (set 8884) to the battery box then the switch on the battery box will connect the power source to the 9V and 0V lines to power the IR Receiver. It will work only one way round so check polarity before you leave it on for more than a second or two. If the green light on the IR Receiver doesn't light up then you have it the wrong way round; just move the battery box switch the other way.
The Medium Motor has been around for a while now. It fits well with most theme sets and for the auxiliary functions of Technic sets (the drive function on anything large should use the L- or XL-Motors). It also works well in multiple. In PF trains it is advisable to use one Medium motor per bogie for a diesel loco, or consider an L-Motor or the Train Motor.
The Light brick is brighter than previous LEGO light bricks and it is easy to fit the lights to a 1x1 headlight brick or into the holes in a Technic beam. The clear LED housings include a safety feature to prevent the lead being pulled out. The black brick half way along allows the wires to each LED to be thinner and hence to turn more easily and fit into cramped spaces. I fitted the LEDs to a semaphore bracket signal (2 signals together) with no trouble. The thin wires could be held easily by some parts with suitable slots.
My largest project with LEGO LED Light Bricks so far is a lantern. It uses 12 Light Bricks, 1 switch and the AAA battery box (set 88000). When I used the lantern as a pantomime prop it lit up well enough for the audience to see the lights. It is also bright enough to see your way in a dark room. It was a challenge to fit all the wires inside but it helped to stack the plugs and black bricks in 2 groups of 6. The LEDs were inserted into Technic beams with yellow filters on the other side.
The Black brick contains a bridge rectifier and capacitors so that the LEDs both light up with the polarity either way round and light up at the minimum speed setting of an IR Receiver (set 8884). This is good for headlights and general lighting but I would also like to see a future Power Functions product where the LEDs light up alternately with the change in polarity. This would be useful for a police car (2 blue filters), railway signals (1 red and 1 green) or trains that change direction (1 white and 1 red at each end of the loco). Perhaps this piece would have a different colour of 2x2 brick in the middle to tell users that it has a different function. I have experiments with a red/green multi-colour LED to make "searchlight" railway signals compatible with Power Functions, which will have red, yellow and green available from the same aspect, corresponding to the 3 states of the pole reverser switch. Whilst I might hope for that as another future product, it is less likely to happen.
The pole reverser switch just changes the polarity. It does not isolate the power as the battery box switch does. Use the battery box for on/off and the switch for direction change. The pole reverser switch is versatile. It can be actuated from a lever or via a rotating axle from either side. A tiny switch on the back allows a set of switches to be made into a control panel and have their individual polarities set so that "down" always means "on" or whichever function you have assigned to it. An example is a railway signal box, where "down" means the points are set to the minor track, whichever way round the points are. I have put together a set of these switches to drive a set of PF Servo Motors (set 88004) to actuate the points on my railway layout.
The universal joints work well and are an improvement over many years; they were in the first Technic sets in the 1970s. They used to be 4M long and are now 3M long so they fit into smaller spaces and fit better with the studless Technic system.
The white clutch gear helps to prevent the motor straining if the function it drives has end-stop limits. It works well with limited-travel Technic set functions. The only application where I found its torque limit too low was in changing railway points quickly; it takes a lot of torque to overcome the resistance in the slider. It worked OK with various gearmotors up to the Medium motor but in location where I couldn't see directly it was better to use the Servo Motor instead because that has a built-in limited travel.
The design of the 8-tooth cog has been changed now (the new one has better torque capability) so there might be a change to this set soon.
The 24-tooth cog is a stalwart of the Technic system and useful for gearing down the motor (with the 8-tooth cog). In rarer applications it may be used to speed up the motor for a small propeller. I do miss the extra axle holes that were rotated 45 degrees compared to the centre axle hole. Those holes were used in the early Technic piston engines but their particular distance from the centre axle hole (0.707M) gave them another application because the stroke length of a small (1/5) pneumatic cylinder is less than 2M and the earlier version of these cogs with the 45-degree cross hole allows the cylinders to be made into a pneumatic motor or steam engine. Look on the Bricklink site if you need the old style cog for an application such as this.
Overall there is huge amount of value in this set, once the price is sorted out.
"
I would recommend this to a friend!
My Product Recommendations
Power Functions Servo Motor
(11)


LEGO® Power Functions AAA Battery Box
 (35)
(35)

From: DERBY
From:
United Kingdom
Age:
35-44
years old
Customer Type:
LEGO Fan
Building Experience:
Expert LEGO builder
Purchased For:
Self
Build Time:
15
mins
Play Experience (Optional):
5
/
5
Value for Money (Optional):
1
/
5
Level of Difficulty:
Easy
Very Easy
Very Challenging
I would recommend this to a friend!
Share:
+20points
25of 30found this review helpful.

Mobile Crane MK II
Mobile Crane MK II
Posted:July 31, 2014
mbellis
Age:
35-44
years old
Customer Type:
LEGO Fan
Building Experience:
Expert LEGO builder
Overall:
4
/
5
A good successor to 8421, but room for improvement
" This crane has a lot to live up to, being the successor to 8421 and also a flagship set.
Functionality and Play value:
- 4-axle steering works well, but the rake is small. This is a common problem with Technic sets. A real crane of this number of wheels or more (e.g. 7 sets in the main body) can turn easily enough at a set of traffic lights but I doubt the 42009 model would make it round the corner at a scale junction. I removed the blue half pins from the front set of wheels and this made an improvement but the wheels are close to binding on other parts. You just know that if the instructions show half pins restricting the steering then it won't be enough. The steering philosophy of Technic sets needs to be improved. Look at 8479 barcode truck the best example.
- Engine and differential gear are the usual fare. They work well. There might be room for a gearbox next to the vertical row of 5 z16 cogs.
- The stabilisers are more realistic than 8421. More width of extension would be nice but the long axles and sliding cogs are a welcome improvement to the Technic range of mechanisms. My crane did have a problem getting enough torque to the mini-LAs for dropping the feet though. The white clutch gear slipped when that function was engaged. I think an extra instruction step to test the stabilisers from a temporary motor drive (before building the jib unit) might be a good idea.
- The raising of the jib works well, though I have doubts about the linear actuator gearing. The design of the LAs has changed, to improve their internal clutch, but has this resulted in complacency of design by using the gear arrangement from excavator 8043 that failed with the old LAs? This is teaching kids bad engineering. We should be explaining to them why the gears should all line up so that all the LAs extend similarly as the jib is raised, without any differential movement between them. Otherwise someone will do that on a real machine and cause an expensive problem! Don't let poor design principles creep into LEGO sets!
- The jib extension works OK but the ratio of extension to original length is poor. More extension from the same length should have been possible. As a follow-on to 8421, a further extension should have been included, otherwise Technic crane technology would not move forward. Of course real cranes can have 6 or 7 telescopic extensions with hydraulics, which would not be possible within a reasonable weight for geared Technic models.
- The winch function works well but is a bit slow.
- According to the jib gearbox, some of the functions need the motor direction to be reversed in order to make a consistent movement of the whole crane e.g. raise, extend and lower the hook. This makes operating the crane a learning process.
Pros:
- Stabiliser mechanisms are a useful development.
- Stabiliser slide support with angled cross blocks is effective.
- Red sliding z8 cogs and long axles.
- Plenty of racks, 4x steering and doubled-up for stabilisers.
- L-motor has plenty of power, but not as much as the 8421 motor.
- Well-built chassis spreads the weight and remains stiff.
- 2600 parts is a welcome increase in Technic set size. I look forward to Technic sets of 5000 parts!
Cons:
- I wish the yellow panel parts (6 on the jib) had not needed additional recessed holes. I hope these will not be needed again. Their design pollutes the population of excellent smooth panels that we have enjoyed in other sets. Unfortunately, once the parts are made, the mould will be used until it expires. I am unlikely to buy any set containing the revised panels unless they are really needed.
- Stabiliser drop function can have torque issues if not tested before adding the jib.
- Mis-use of linear actuator clutches to solve differential issue in jib raising gear trains. 8043 excavator lesson not learnt.
- Needs more extension of the jib compared to its original length.
I think this is an adequate successor to 8421 but some functions are not quite so good. Steering rake and jib extension ratio should be improved next time. Looks are not quite as good as 8421, partly because the wheel hubs are the other way round. Value for money is good in parts count terms.
For the Mk III crane, in a few years' time, I would like to see a mobile crane using the Unimog wheels, with pneumatics for most of the functions. It would be possible to use pneumatics to drive all of them if extensions, rotating air engines and proportional steering techniques were employed; this would certainly add to the Technic range of mechanisms. It would need several compressors.
I would like to see the return of a motor like the 8421 motor as it is more powerful (torque x speed) than the Power Functions motors and more suitable for driving high loads quickly.
I have seen a real mobile crane with 7 sets of wheels in the main body, 3 steering at the front and 2 at the back, with a 4-wheel trolley carrying the counterweights. Time to start the design now!
An additional small crane for lifting counterweights onto the back of the jib would be an opportunity for a realistic additional mechanism to offset the cost.
"
I would recommend this to a friend!
My Product Recommendations
Cargo Plane
(45)
Power Functions Servo Motor
(11)From: DERBY
From:
United Kingdom
Age:
35-44
years old
Customer Type:
LEGO Fan
Building Experience:
Expert LEGO builder
Purchased For:
Self
Build Time:
06
hrs
Play Experience (Optional):
3
/
5
Value for Money (Optional):
4
/
5
Level of Difficulty:
Challenging
Very Easy
Very Challenging
I would recommend this to a friend!
Share:
+3points
3of 3found this review helpful.

Twin-rotor Helicopter
Twin-rotor Helicopter
Posted:July 26, 2014
mbellis
Age:
35-44
years old
Customer Type:
LEGO Fan
Building Experience:
Expert LEGO builder
Overall:
5
/
5
Let your Technic career take off!
" This is one of the best small Technic sets I've seen in recent years, and the only one I've bought; I usually buy the larger sets but this set has better value for money than usual for a small set, maybe because the wheels are small.
The set has 3 functions:
- Twin rotors that rotate in opposite directions like a Chinook helicopter and are actuated from the rear. These spin well as long as you make sure the parts rotate freely as you build.
- Swivelling front wheels for taxiing.
- Opening rear cargo ramp.
- Twin rotors that rotate in opposite directions like a Chinook helicopter and are actuated from the rear. These spin well as long as you make sure the parts rotate freely as you build.
- Swivelling front wheels for taxiing.
- Opening rear cargo ramp.
Pros:
- Good parts for small aircraft models.
- Very swooshable!
- Small enough to be swooshed during a long car journey.
- 4 wheels are provided so a car could be built from the parts.
- This is a good set to buy in multiple if you need the the rotor blades, the gear brackets or the small wheels, which are very useful for guiding sliding things (see crane 42009).
- More experienced builders can move on to the Cargo Plane 42025. I added the rotors from 42020 to my Cargo Plane to give it more-realistic 6-blade propellers.
- Good value for money as small Technic sets go.
Possible improvements:
- The instructions did not advise any particular orientation of the two rotors relative to each other. This may be because they are at different heights and do not bend in the model, so they would not clash. On a real Chinook the rotor orientation is critical to keeping the blades apart; a gearbox failure could lead to a blade clash and loss of the aircraft. The set opens up opportunities like this to learn more about aircraft, making it an ideal accompaniment to a flight or an aircraft museum visit.
- The rotor parts have good grip on the hub piece but there would be a limit to rotational speed if such a rotor were motorised in your own models. When I was young I used to put wheels or propellers on a motor and rev it up as fast as possible! This raises the opportunity to learn about robust rotor construction. In this case a 3-lobe piece like design ID 32125 could stop the blades detaching at high speed.
This is an ideal introduction to the Technic theme for young engineers. Since some Technic sets used to start at 6 years old, perhaps a talented child younger than 7 could build it with supervision.
"
I would recommend this to a friend!
My Product Recommendations
Cargo Plane
(45)From: DERBY
From:
United Kingdom
Age:
35-44
years old
Customer Type:
LEGO Fan
Building Experience:
Expert LEGO builder
Purchased For:
Self
Build Time:
30
mins
Play Experience (Optional):
5
/
5
Value for Money (Optional):
5
/
5
Level of Difficulty:
Easy
Very Easy
Very Challenging
I would recommend this to a friend!
Share:
+3points
4of 5found this review helpful.

Benny's Spaceship, Spaceship, SPACESHIP!
Benny's Spaceship, Spaceship, SPACESHIP!
Posted:July 26, 2014
mbellis
Age:
35-44
years old
Customer Type:
LEGO Fan
Building Experience:
Expert LEGO builder
Overall:
5
/
5
Bring on the Classic Space Revival!
" If you buy only a few sets then this Spaceship should be one of them. It alludes heavily to the Classic Space era of the late 1970s and 1980s and is definitely as awesome as advertised! Quite a few of the pieces are carried over from the Classic Space era and it's great to see them again.
Functionality and play value:
- Extending wings, deployed by pushing in the lower jet at the rear.
- Removable scooters, with adjustable wings and screens.
- Opening cockpit - might do with better fixing of its hinge plate as it did detach easily with sudden movement. OK with gradual movement though.
- Opening control room - this has no windows so you should decide how long the characters would like to stay in there, next to the reactor!
- Harness for Astro Kitty, for when swooshing includes a barrel roll!
- Raising radar dish and deployable droids.
- Weapons - flick missiles, press-down lasers and larger yellow-tip cannons - these follow on from several ranges but never appeared in Classic Space sets. I wish space exploration could be more peaceful as it was in the early days but it seems the market demands minifigs to have competitors and aggressive negotiation capabilities!
Pros:
- Techniques for inverting the stud direction of bricks are in this set: wheelbarrow wheels for studs apart (on the parts above the wings) and 2x2 round tiles with hole for studs together.
- The dark grey body parts provide a bit more volume than the 6x6 tray parts that were in many Classic Space kits. This makes more room inside for minifig conversations and storing cool stuff when you make your own spaceships from the parts.
- The frames are useful structural parts for many models.
- Extra strength in the chassis is provided by pegs attaching the parts together. This makes swooshing easier without any fear of collapse!
- Many parts from Classic Space and printed 2x4 roof bricks with the space logo.
- Good selection of roof bricks that will fit together smoothly in your own models.
Cons:
- Putting stickers onto roof bricks. These should have been printed bricks instead.
- Sticker placement on fins is difficult to do consistently. It would help if the sticker shape matched the fin shape.
- The arms of the droids are too weak in their clutch where the underside of the stud meets the droid body. Proper LEGO (as opposed to clone brands) is only as good as its clutch power. a 3M Bar should be used to hold the arms in place better - one was used in the droid of the LEGO Space history freebie pack. Design change review of droid arm underside advised.
Things I would have liked to see in the set, which are missing and which I hope to see in future Classic Space sets:
- No landing feet (compare Classic Space ships) or even boat studs for that purpose, despite boat studs being used on the underside of the parts above the cannons.
- No cargo hold as the wing extension mechanism takes up the space.
- No landing feet (compare Classic Space ships) or even boat studs for that purpose, despite boat studs being used on the underside of the parts above the cannons.
- No cargo hold as the wing extension mechanism takes up the space.
Overall this set makes a great step towards the revival of Classic Space, which would easily extend the awesomeness to a room full! I will probably buy at least one more of these. Continue the revival with the Exo-suit coming soon!
"
I would recommend this to a friend!
From: DERBY
From:
United Kingdom
Age:
35-44
years old
Customer Type:
LEGO Fan
Building Experience:
Expert LEGO builder
Purchased For:
Self
Build Time:
03
hrs
Play Experience (Optional):
4
/
5
Value for Money (Optional):
3
/
5
I would recommend this to a friend!
Share:
+1point
1of 1found this review helpful.

Service Truck
Service Truck
Posted:April 23, 2014
mbellis
Age:
35-44
years old
Customer Type:
LEGO Fan
Building Experience:
Expert LEGO builder
Overall:
2
/
5
Service Truck needs servicing!
" Best things about this set:
- First set to have two small pneumatic cylinders.
- Green parts. I hope we will see more of these in Technic sets and that it is not just using up the stocks of parts made for previous sets like 8063 Tractor and Trailer.
- First set to have two small pneumatic cylinders.
- Green parts. I hope we will see more of these in Technic sets and that it is not just using up the stocks of parts made for previous sets like 8063 Tractor and Trailer.
Problems:
- The white clutch gear acts only on the winch. This means the stabiliser and main boom functions hit their end stops and cause jumping of the gears. The main boom universal joints popped off the Linear Actuator. Many previous sets have placed the clutch gear between the motor and the function gear selectors.
- The pneumatic hoses are in the way of the wheel lift when built according to the instructions. Turning the cylinder round can improve this but then the hoses are in the way when the stabilisers are deployed. The red tube could be removed and the 10M axle could be replaced with two 4M axles and a stepped-back link (e.g. with 1x2 "++" half beams and a 3M axle) to provide room for the hoses whilst handling the stabiliser loads.
- The winch boom extension is not long enough to avoid the winch hook fouling the wheel lift in its upper position when the main boom is at the top of its travel. The winch seems to be the only reason to raise the main boom so high. Perhaps a larger pneumatic cylinder would have allowed a larger lever to be used for a longer extension.
- Motor cable routing was not clear in the instructions. I had to modify it after building just to make it reach the battery box but also to stay clear of the steering gears.
Fixing these problems and monitoring when functions reached their end stops meant my truck spent most of its time with the green side panels removed.
Less serious things I didn't like:
- The chassis bends a bit by the grey triangular brackets when there is significant load on the wheel lifter. Could do with a 13M beam each side to stiffen it; the grey cross-beam could be extended. There is a general point about studless chassises being less stiff for the number of beams, which has not been learnt since the advent of studless sets and is a reduction in the quality and feel of the sets. A better blend of studless and traditional brick beams might be better - brick beams for a stiff chassis and studless beams for vertical bracing and accessories. Make more use of the half beams as well.
- Cross beams at the rear wheels can move about. This is sloppy and could be fixed easily with 2 cross blocks, 2 3M axles and longer pegs in the chassis for each rear axle.
- 4-wheel steering has the right effect and the front wheels have a better rake then some sets but the steering struggles with these wheels. The aim of a steering mechanism is to get the kingpin pivots as close to the centre of the wheels as possible - look at real vehicles. The wheel width is too wide for front wheels of this diameter. There is a narrower wheel that should have been used instead - wheel design ID 56904 and tyre 56898, which were used in tractor 8260. The front axle beams would have been longer with those wheels; I hope they will be used more in future.
- The yellow function controls are laid out OK but the battery box switch is not so easily accessible for changing direction.
- The truck has 9 functions including the motor, so £90 is probably enough to pay. Might be good on discount though.
- Not worth downloading instructions for such a long-build alternative model. Who has enough space around their computer to build a large set?
As a building experience, the gearbox part was the most enjoyable. There was a lot of building of non-technical items at the end - the cab and side panels. As usual some things could have specified building two of the same sub-assembly and them splitting into two mirrored sections, like the doors where a different panel is added to the same set of half beams.
Considering the more expensive parts in the set, it is worth buying if you want the wheels, pneumatics and green parts and don't mind having another motor and battery box. There are a lot of long red beams too. For me it was better as a parts pack than for the model itself.
A pneumatic steam engine could be made with the parts from this set. Get each cylinder to push the switch for the other one and use a higher gear ratio between the motor and the compressor than the truck model uses.
This truck makes a good companion for the flatbed truck 8109 but perhaps it's time for the next truck in this series to be something other than a breakdown vehicle. It's not easy to find vehicles with enough functions but perhaps an unfolding fairground ride truck would be possible.
"
My Product Recommendations
Power Functions Servo Motor
(11)
4X4 Crawler
 (53)
(53)From: DERBY
From:
United Kingdom
Age:
35-44
years old
Customer Type:
LEGO Fan
Building Experience:
Expert LEGO builder
Purchased For:
Self
Build Time:
04
hrs
Play Experience (Optional):
2
/
5
Value for Money (Optional):
2
/
5
Level of Difficulty:
Easy
Very Easy
Very Challenging
Share:
+26points
32of 38found this review helpful.
Power Functions Servo Motor
Power Functions Servo Motor
Posted:February 8, 2014
mbellis
Age:
35-44
years old
Customer Type:
LEGO Fan
Building Experience:
Expert LEGO builder
Overall:
5
/
5
At last LEGO has a Servo!
" Have waited a long time for this, many years whilst RC cars and aircraft developed and then many months since the first release of the LEGO servo motor in sets. Bought two Crawlers 9398 in 2012, built one and used the other for motor experiments. It didn't take long to think of some applications for the servo motor but a Crawler revamp (41999) and a problem meant that we had to wait till now, in 2014, for the servo motors to be available separately in significant numbers. It was worth the wait - I would rather have best quality; it is what we have come to expect from LEGO.
The servo motor is not quite the same as an RC car or aircraft servo. Instead of direct proportional control it has 7 positions either side of centre if you use the train remote handset 8879 or an NXT or EV3 to drive it. This is great for vehicle steering and any kind of proportional control. I used an NXT and IR Link sensor with an IR Receiver 8884 to test the first servo motors, the program moving each one through all its positions in a sequence by setting the motor speed in the program block to different values. As well as steering or aircraft flight surfaces, the proportional function can be used for robot limbs or facial features, or to drive a pneumatic servo for proportional pneumatic control.
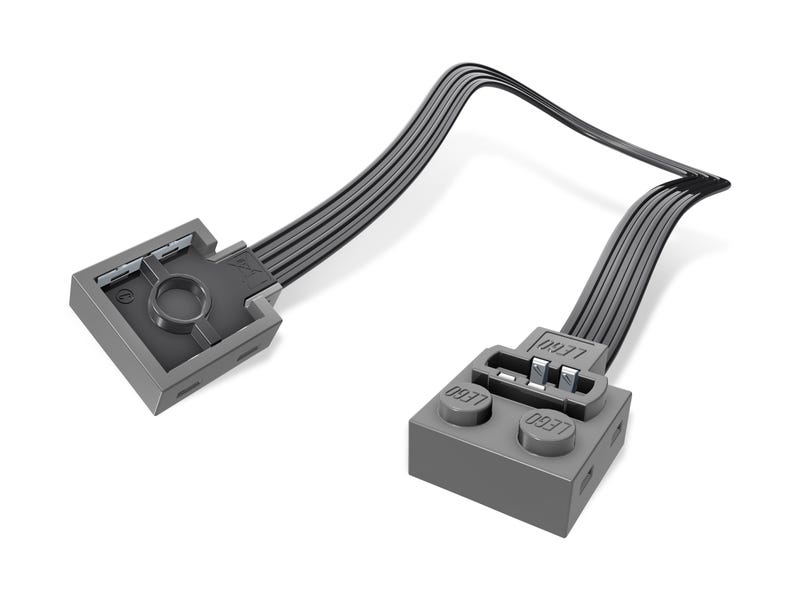
When used with the pole reverser switch 8869 or bang-bang remote 8885, the servo motor has just 3 positions - the centre position and the end-stop positions 90 degrees either side of it. This is great when you know you want a 90 degree movement. I used this function to control rail points (on the right in the picture) and also a points junction for a new type of monorail (on the left in the picture). The rail points application (7895 or the previous 9-Volt version 4531) does not need any modification to the points because the servo motor has plenty of torque. It just needs a long rack to actuate the slider, available in Jet Plane 9396, Mobile Crane 42009 and other sets, with a 12:20 gear ratio to make the 90 degrees of servo movement correspond to the slide length of the point mechanism. You can make a control panel for many points and signals with the 8869 switches.
The great thing about the servo motor in 2- or 3-position applications is that it has built-in electronic end-stops. This replaces a gearmotor or PF medium motor used with a white clutch gear. When changing the rail points with a pole reverser switch (centre position for point straight, down for point curved, up position blocked with a 1x2 slider plate) the servo will move the points to exactly the right position without the operator having to watch or listen for the clutch gear slipping and the wow-wow sound of the gearmotor when it does so. This means it is OK to have the points out of sight because the position reliability is good.
Other previously-motorised 12-Volt train functions suit the servo motor well, like decoupling (onboard the train or trackside) or level crossing barriers or gates. As an upgrade from the 12-Volt level crossing 7866 you have the choice of smooth barrier control by using the train remote handset or NXT.
You can connect servo motors in parallel electrically, such as to control two rail points together, one at each end of a loop, to change trains. I will use these loops several times on my layout - 12 points to select from 4 trains each way. Quick changes of trains are better at exhibitions because people can see the new train sooner - the changeover speed is enabled by the servo motor.
I tested the servo motor parallel operation. When controlled together with very weak batteries or high loads the two servos might not actuate at exactly the same time but they will both keep retrying and get to their destinations unless the load is too great. With just two motors in parallel the effect is minimal but I tested it with 10, 15 and 20 servo motors driven from a single pole reverser switch with deliberately-weak batteries (at the bottom of the picture). All the motors got to their destinations eventually, one after the other - as one moved and drained the weak supply (shown by the battery box LED dimming) it affected the others so they tried again. Parallel performance will be much better with either fresh batteries or a mains-derived supply, which could be from a 9-Volt train controller or the PF LiPo battery 8878 with charger 8887. I will use either of the last two solutions when exhibiting a railway layout.
Under high load the servo will do its best to get to the destination but if it detects an overload it will release the torque so as not to damage itself. If you find this happening in your model then you should either gear it down or use two servos in parallel.
Look out for another Technic set containing a servo motor in the autumn of 2014 or buy these up to 5 at a time! These servo motors are a serious but worthwhile investment and will enhance your control functions in all types of LEGO creations.
"
Images for this Review
(click to see full-size image)

I would recommend this to a friend!
From: DERBY
From:
United Kingdom
Age:
35-44
years old
Customer Type:
LEGO Fan
Building Experience:
Expert LEGO builder
Purchased For:
Self
Play Experience (Optional):
5
/
5
Value for Money (Optional):
3
/
5
Level of Difficulty:
Challenging
Very Easy
Very Challenging
I would recommend this to a friend!
Share:
+107points
132of 157found this review helpful.

Horizon Express
Horizon Express
Posted:February 27, 2013
mbellis
Age:
35-44
years old
Customer Type:
LEGO Fan
Building Experience:
Expert LEGO builder
Overall:
4
/
5
Good Train Set but Upgrades Compromised
" Pros:
Looks good with detailed brickwork and orange parts
Nice minifigures
Good techniques to learn
Good black 1x2x3 windows - bring back the proper 1x2x3 train window glass piece!
New brackets useful for MOCs
Value kept up by reduction in wheels & couplings.
Looks good with detailed brickwork and orange parts
Nice minifigures
Good techniques to learn
Good black 1x2x3 windows - bring back the proper 1x2x3 train window glass piece!
New brackets useful for MOCs
Value kept up by reduction in wheels & couplings.
Cons:
Orange baseplates not so useful for MOCs as grey or black.
Orange sloped front pieces not so useful for MOCs.
The couplings are poor - this is common to all recent LEGO trains. The couplings have rotating magnets inside. This was needed for children's safety so they cannot be swallowed. However, this spaced apart the magnets with air and plastic in between, weakening the coupling grip. Sometimes the grip is particularly weak so that the engine pulls away leaving the coaches behind. This can be cured by waving the two couplings around each other - above, below and at the sides - to unstick the rotation of the magnets. Unfortunately this means the couplings are unreliable and cannot be used for shunting. Cannot expect the user to pick up the engine and coach to wave the magnets every time! I use 2x2 plates with hole (as on the shared bogie), 1x5 thin liftarm and 2 1.5M pegs for permanent couplings for a rake of wagons. This is strong enough for 4 heavy 8x64 coaches.
As an "Expert" set this is aimed at the AFOL market. Its advertising in the catalogue suggests adding a second Horizon Express model. This is a deliberate ploy to make the train with two streamlined ends. I bought 2 sets. The advertising also advocates upgrading it with Power Functions. I added all those parts. However, the two recommended upgrades are incompatible with each other.
One motor is not enough to power a 6-car train, especially if your layout has any hills. The motor itself is good but you need a medium speed setting just to move the train so there is no fun left in changing speed. My hills are not steep, only up to the maximum of 1 in 30 recommended for model railways. This is 1 plate in 12 studs long. 1 in 40 on curves is 1 plate in 16 studs. The train runs away down a hill and struggles up a hill. Speed 4 or 5/7 of PWM is OK but less will not get up the hill and more can derail at the bottom going down it. 9V trains could use insulating tape to make sections and diodes to drop voltage on the downhill sections but PF trains need an automatic speed setting for each location, driven from an NXT with IR Link sensor (I expect the NXT EV3 with its IR sensor would work just as well when it is released).
The train is vulnerable to the shared bogie derailing, especially when the motor is pushing from the rear. This might be just like the real train - some types with shared bogies have suffered this.
To motorise a double set there are different ways:
a) 2 motors at the front: Needs room for a pole reverser switch in the engine and the 2nd motor will widen the gap to the next carriage. This still has the coupling detachment vulnerability.
b) 1 motor at the front and 1 at the back, each engine upgraded as per upgrade instructions: The pulling motor has to be faster than the pushing motor or the train will derail. The two IR receivers in the two engines have to be on the same channel. The rear engine needs a pole reverser switch to reverse its motor as it is the other way round. The two IR receivers have to both get the same signal or the train will derail or split.
Multiple motors needing the same signal, combined with the 2-motor power limit of an IR receiver, is a fundamental problem with Power Functions trains that TLG has not addressed. We need a slave motor driver, like the IR receiver but taking a motor drive input instead of IR. Then one IR receiver could drive several motors, each with a slave motor driver.
In either method a wire the length of the train is needed to power the rear lights. This wire would need a PF cable per carriage, probably 6 wires.
The set has no trans-red cheeses (1x1 slopes) for the second set to make the rear of the train. It's OK - I have a few from other sets - but what about anyone who does not? Of course reversing the train needs the lights to switch or change colour; I have a circuit for that but it is too much to expect from this set.
In summary the set is good in itself but does not meet AFOL customer requirements for the recommended upgrades of a motorised double set. It only highlights the inadequacies of Power Functions for all but the smallest trains. The problems can be fixed with these two items:
TLG please make the slave motor driver as a proper Power Functions piece. This takes a motor drive signal on C1&C2, isolates it, perhaps with an IR coupler in the brick, has a pole reverse option switch and replicates it with fresh power on the output from another supply, using the standard motor driver chip.
TLG please also make inductive charging for the LiPo battery, one coil in a 2-plate high tile between the rails and one in a brick to put under a carriage, with a plug for the battery. This will avoid us having to remove the roof every time we need to charge the battery. Look at mobile phone wireless charging as an example.
As a Control Systems Engineer I would be happy to help you develop these items. "
I would recommend this to a friend!
From: DERBY
From:
United Kingdom
Age:
35-44
years old
Customer Type:
LEGO Fan
Building Experience:
Expert LEGO builder
Play Experience (Optional):
3
/
5
Value for Money (Optional):
4
/
5
Level of Difficulty:
Easy
Very Easy
Very Challenging
I would recommend this to a friend!
Share:
+48points
62of 76found this review helpful.

Mercedes-Benz Unimog U 400
Mercedes-Benz Unimog U 400
Posted:October 17, 2011
mbellis
Age:
35-44
years old
Customer Type:
LEGO Fan
Building Experience:
Expert LEGO builder
Overall:
5
/
5
Great New Flagship Technic Set
" Lots of good things about this set:
- Biggest Technic set ever.
- Bigger wheels for 1:12 scale models.
- New compressor and hose connector parts for the pneumatics.
- New transmission parts - ball joints and reduction gear blocks. A must-have for truck trials.
- Lots of orange parts - a nice change from red and yellow.
- Instructions in a protective bag - no more crumpling!
- Plenty of functions for the price.
- Invites challenges for My Own Creations.
Not difficult for an experienced builder. One or two places it helped to look ahead in the instructions to see how something fitted.
A problem with some Technic set models is the limited steering rake. This makes the turning circle very big when a house is quite small! On the Unimog the steering rake (and hence playability) can be improved by removing four dark grey pegs from the front differential frame. In the long term I wish the LEGO company would make models with the steering pivots much closer to the wheels, so that the wheels do not move so far forward or backward along the chassis when they turn. In the Unimog's case, nearer by 2 studs (2M) would be good. The challenge of improving this without sacrificing ground clearance is set for the LEGO community to solve!
Steering is heavy from the roof-mounted control gear. This is because of the distance from the control gear to the wheels (axle torque) and the non-vertical angle of the steering pivots dictated by the suspension system. Suggests that a steering motor should be located near the rack. Maybe more space for a drive motor or two would be good. Could mount one off the rear differential frame at the expense of ground clearance.
Pressing down at the front of the grey body tray shows that the strength just behind the front wheels could be better - the chassis flexes too much. I wonder if the centre blue axle pegs of the front diagonal 11-beams underneath should be replaced with black pegs to reduce the amount of play, or whether more strengthening members are required there.
Overall a great new flagship set. It sets new challenges for MOCs with the new system of truck trial parts and the new 1:12 scale of the wheels. It's about time Technic got some new parts and this is a good selection. Please keep them coming in the future!
Like the Tractor with Log Loader 8049, there are enough pneumatic parts in this set to make a steam engine (clue: get each piston to push the lever of the valve that controls air to the other piston, and swap one pair of tubes over). For a single-function model the small piston can just push a valve lever. A 3-function automatic model is possible with the 3 pistons, 4 valves and motorised compressor in the Unimog set.
Just had to buy a second Unimog so I could put the snow plough on the front at the same time. If you only buy one set this year, it has to be this one!
This is a step forward for a Technic flagship. I hope for a greater challenge in the future. If a Star Wars or Exclusive kit can be over 5000 parts then so can Technic! "
This is a step forward for a Technic flagship. I hope for a greater challenge in the future. If a Star Wars or Exclusive kit can be over 5000 parts then so can Technic! "
I would recommend this to a friend!
From: DERBY
From:
United Kingdom
Age:
35-44
years old
Customer Type:
LEGO Fan
Building Experience:
Expert LEGO builder
Play Experience (Optional):
5
/
5
Value for Money (Optional):
4
/
5
Level of Difficulty:
Average
Very Easy
Very Challenging
I would recommend this to a friend!
Share:
+4points
4of 4found this review helpful.